CharacterControllerの説明
さて、今回はCharacterControllerというものを使って、プレイヤーの移動とジャンプを実装していきたいと思います
②傾斜や段差の判定を自動で行ってくれる
とりあえず、3D空間をいい感じに歩き回れてジャンプとかもさせたいんだ!という方にオススメです
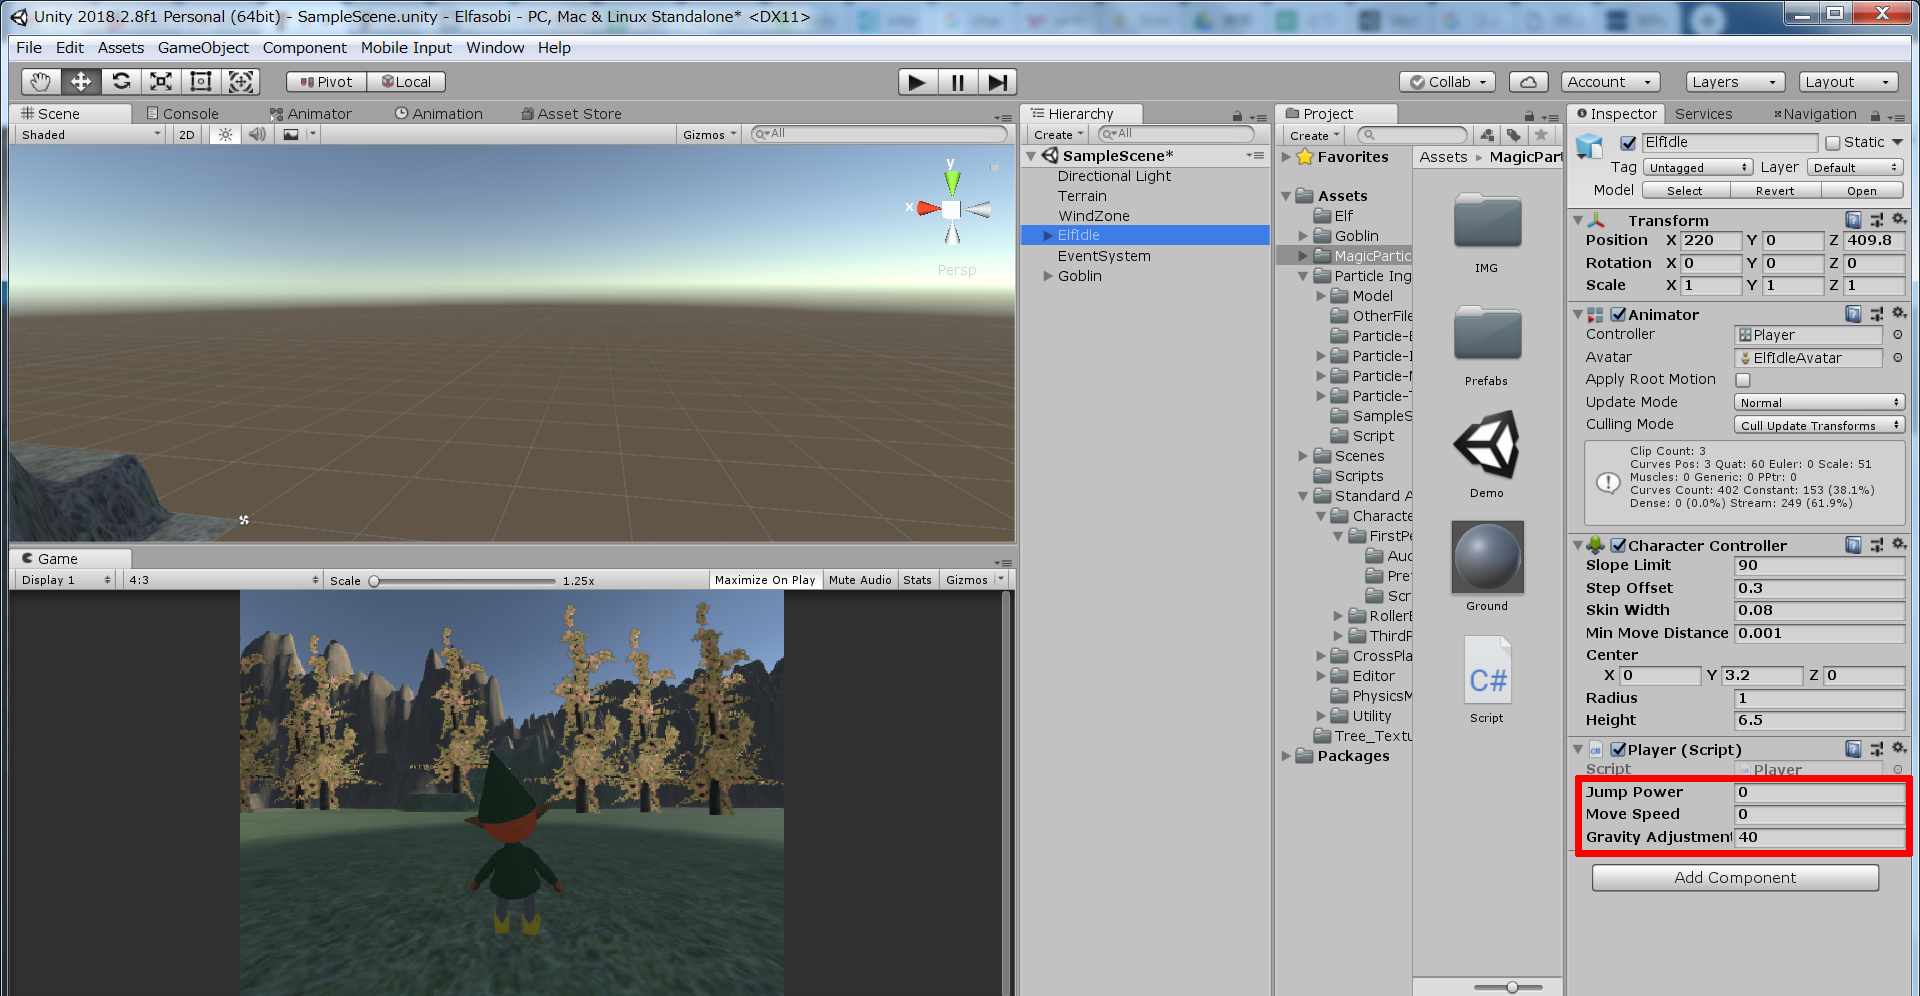
プレイヤーをフィールドに出す
画像のようにプレイヤーの待機アニメーションをドラッグ&ドロップします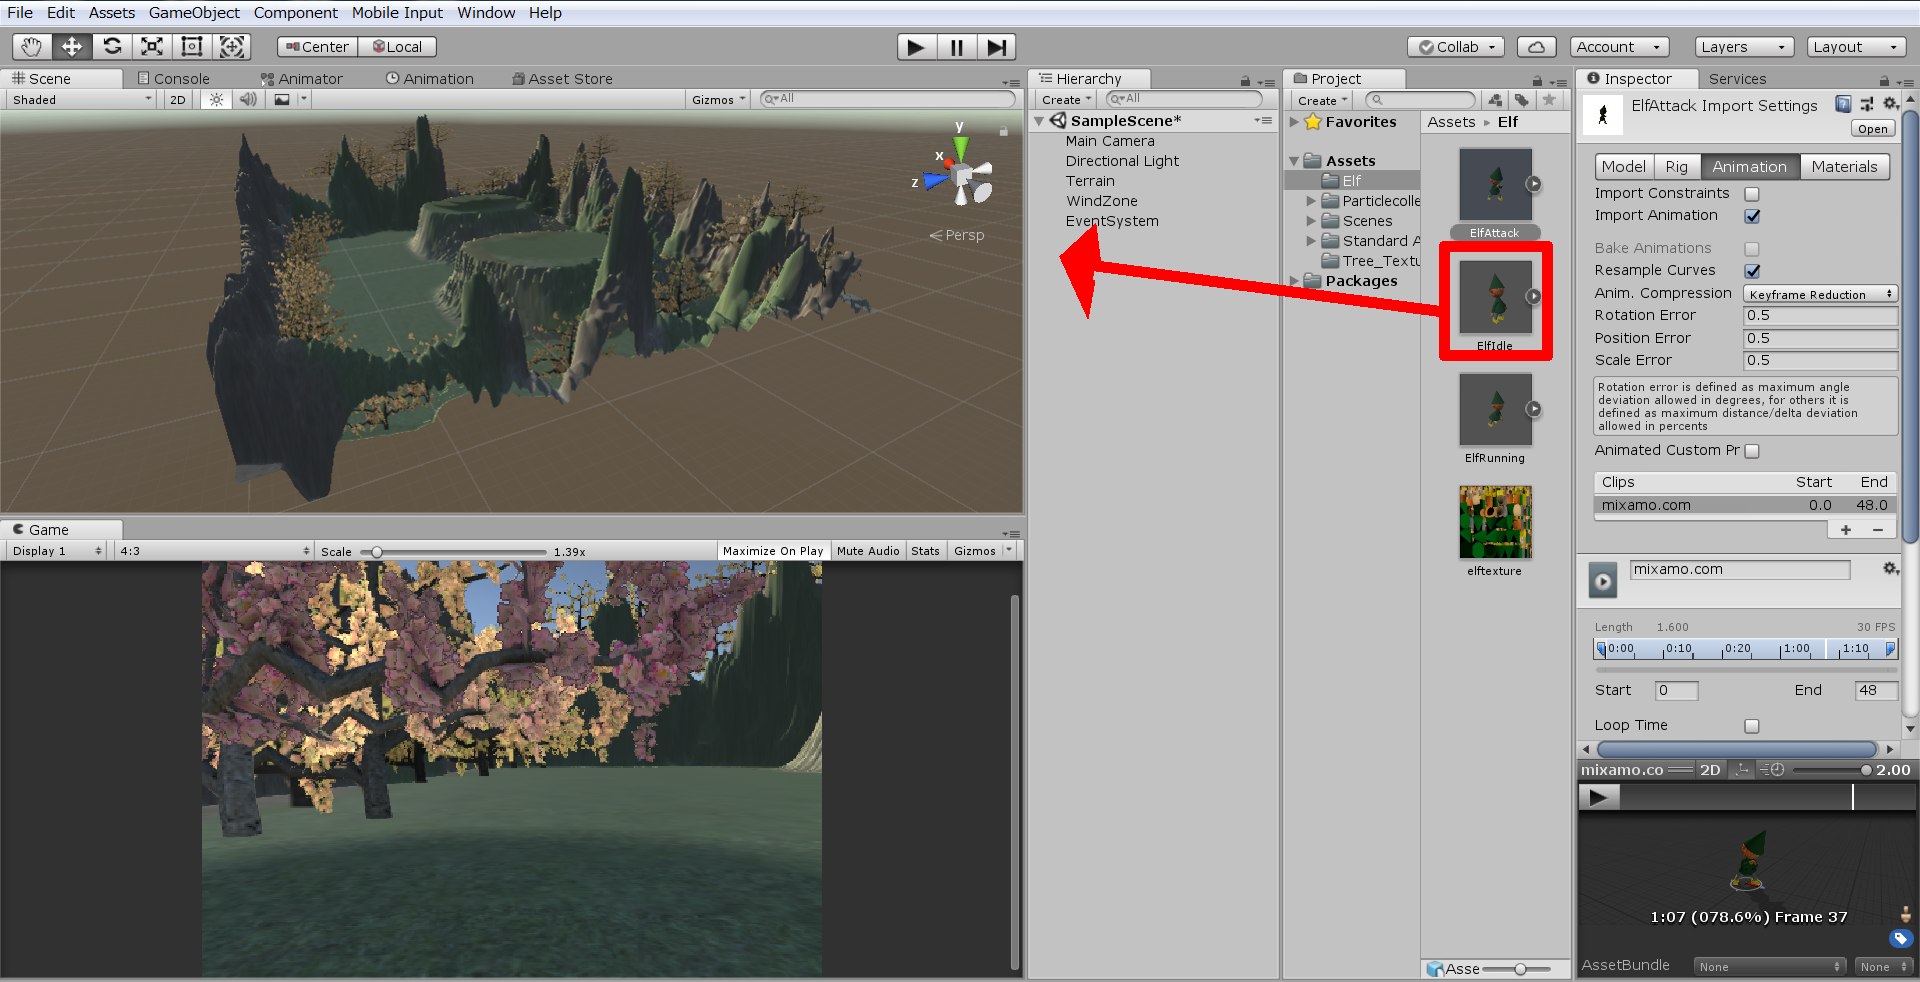
プレイヤーとカメラの位置を調整する
赤枠内の数字をいじってプレイヤーをスタート地点に移動させます
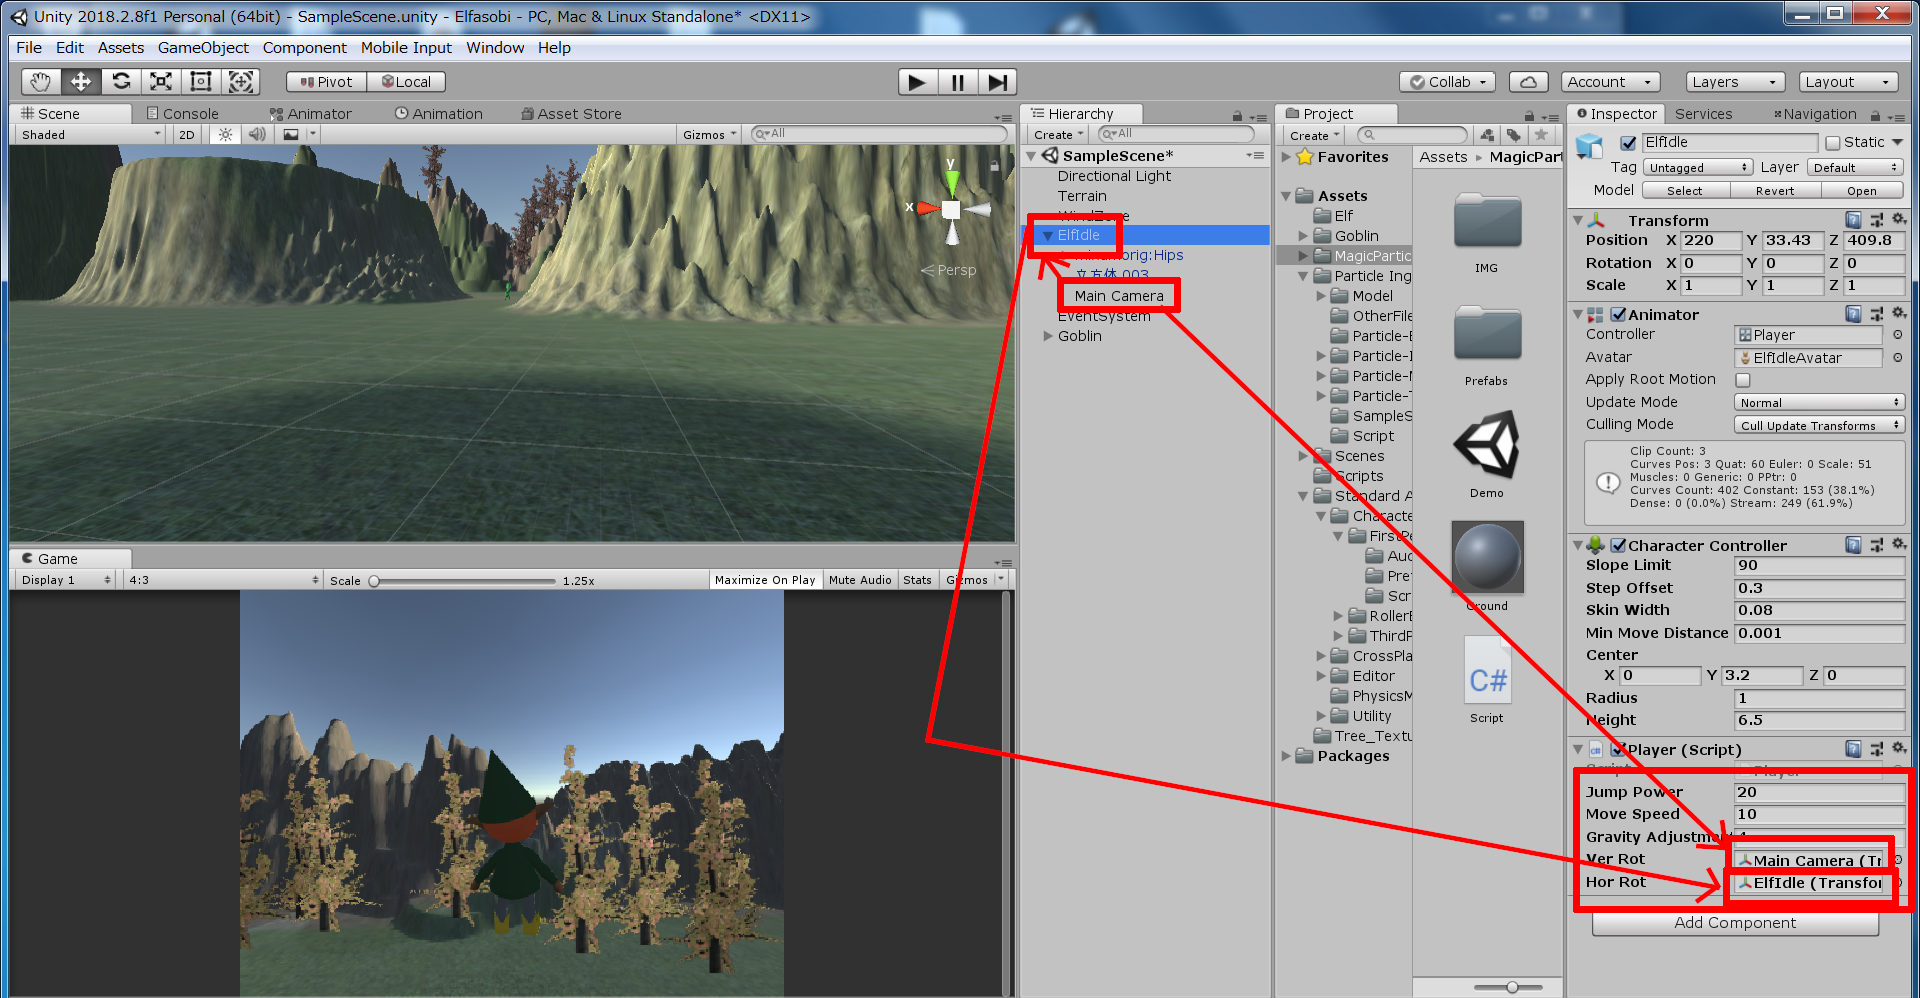
同様にカメラをプレイヤーの後ろに移動させます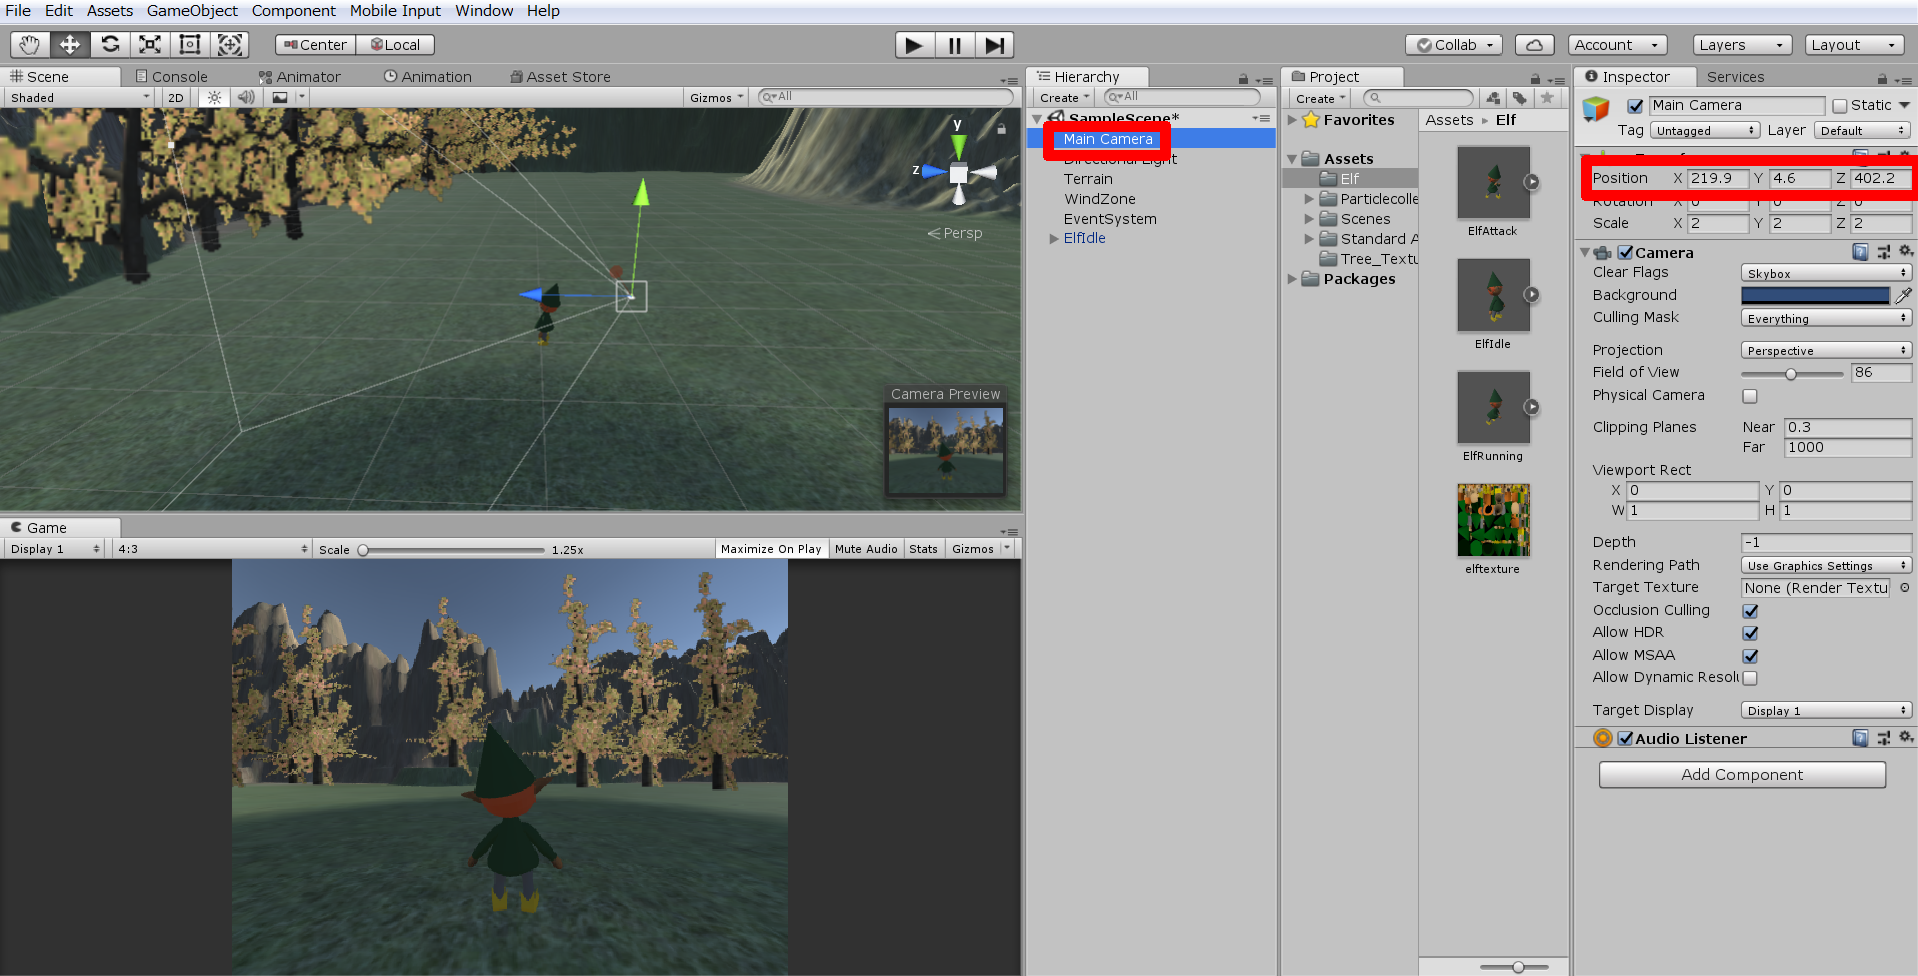
CharacterControllerを取りつける
プレイヤーを選択して、AddComponentをおします
下の検索欄に「ch」と入力して、CharacterControllerを選択します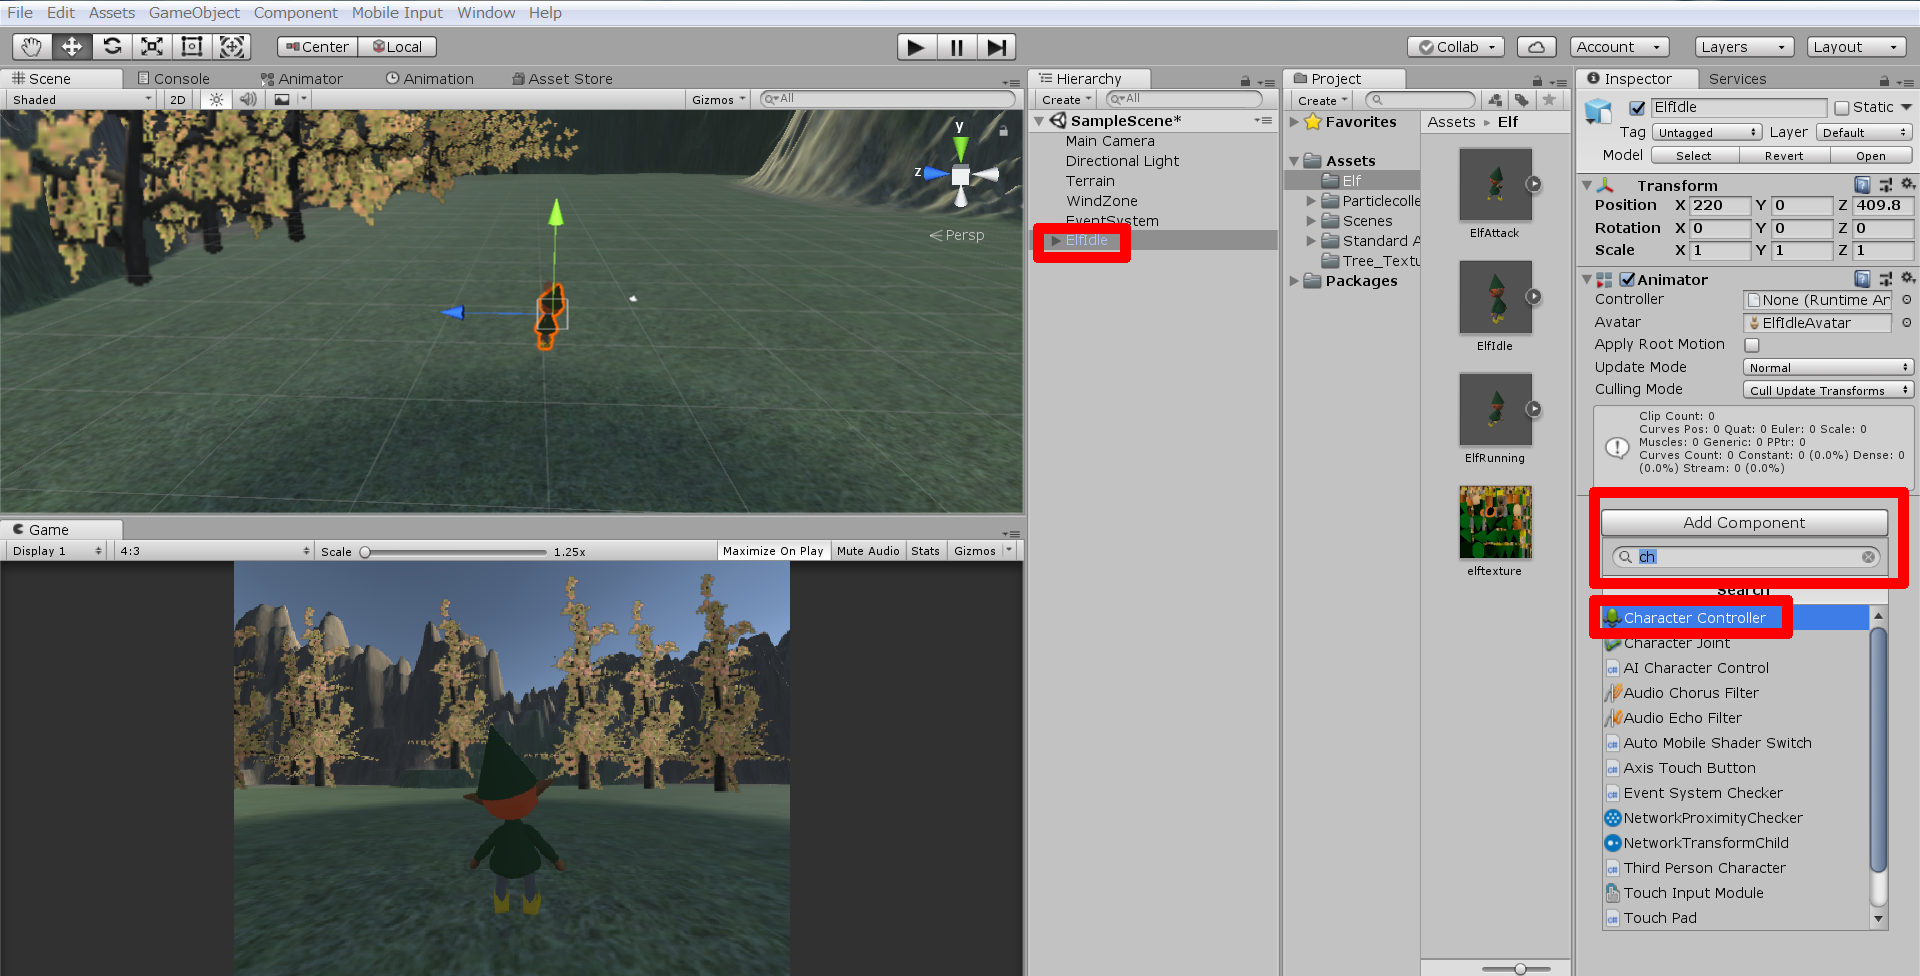
CharacterControllerを調整する
CharacterControllerには当たり判定の役割もあります
なのでその当たり判定がちょうどプレイヤーの頭、胴体、足を包み込むように調整しましょう
画像のように当たり判定のY座標や半径、高さを調整しましょう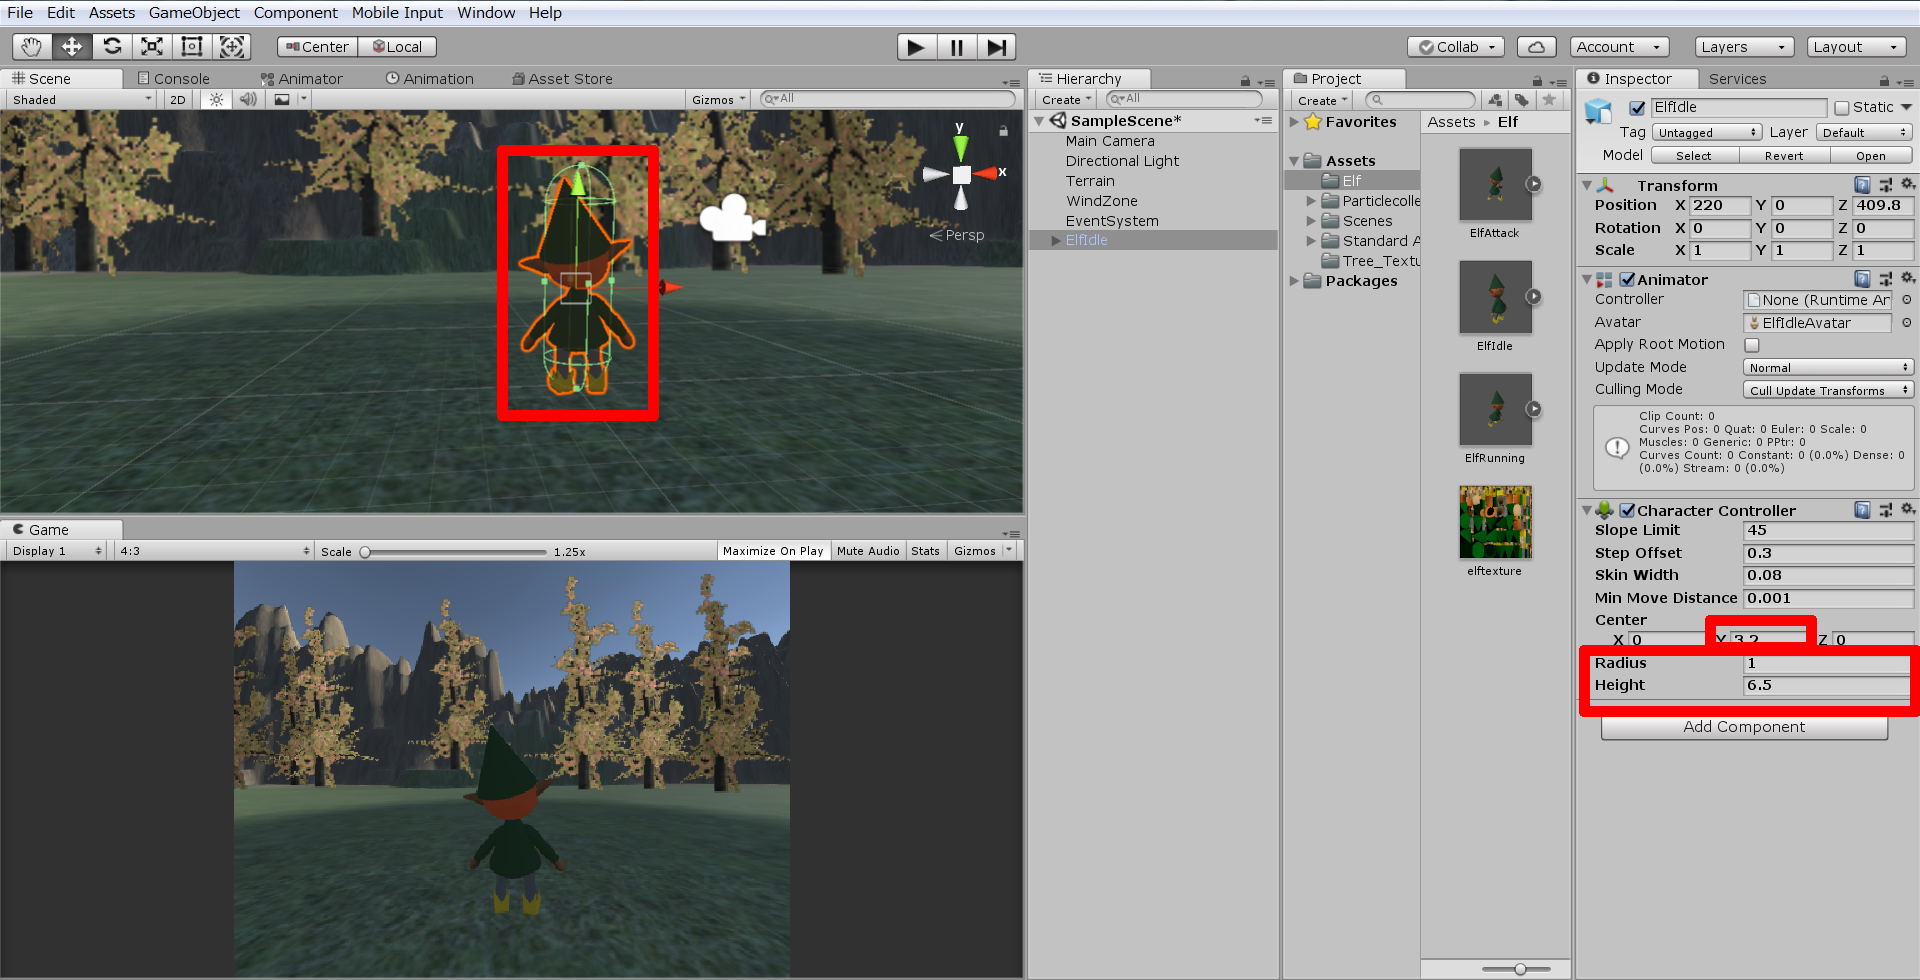
プレイヤーを移動させる
では、プログラミングをしていきます
CharacterControllerにはcharacterController.MoveとcharacterController.isGroundedというCharacterController独自のコードがありますので覚えておきましょう
②()の中にはVector3型の変数を入れる
②if(characterController.isGrounded){}のように使う
スクリプトの作り方やプレイヤーにつける方法はこちらに出てきますので参考にして下さい
以下スクリプトです
using System.Collections;
using System.Collections.Generic;
using UnityEngine;

public class Player : MonoBehaviour
{

    private CharacterController characterController;//CharacterControllerの機能を使うためにcharacterControllerという変数を作成
    private Vector3 Velocity;//CharacterControllerを動かすためのVector3型の変数を作成

    [SerializeField]//SerializeFieldと書くとその次の変数がエディタ上で数値を調整可能になる
    private float JumpPower;//ジャンプ力を入れるための変数
    [SerializeField]
    private float MoveSpeed;//移動スピードを入れるための変数

    // Use this for initialization
    void Start()
    {
        characterController = GetComponent();//characterControllerにCharacterControllerを代入する
    }

    // Update is called once per frame
    void Update()
    {
        characterController.Move(Velocity);//characterControllerをVelocity動かす

        if (Input.GetKey(KeyCode.W))//Wキーがおされたら
        {
            transform.rotation = Quaternion.Euler(0, 0, 0);//0°に向ける
            characterController.Move (this.gameObject.transform.forward * MoveSpeed * Time.deltaTime);//前方にMoveSpeed * 時間経過分動かす
        }
        if (Input.GetKey(KeyCode.S))
        {
            transform.rotation = Quaternion.Euler(0, 180, 0);
            characterController.Move (this.gameObject.transform.forward * MoveSpeed * Time.deltaTime);
        }
        if (Input.GetKey(KeyCode.A))
        {
            transform.rotation = Quaternion.Euler(0, 270, 0);
            characterController.Move (this.gameObject.transform.forward * MoveSpeed * Time.deltaTime);
        }
        if (Input.GetKey(KeyCode.D))
        {
            transform.rotation = Quaternion.Euler(0, 90, 0);
            characterController.Move (this.gameObject.transform.forward * MoveSpeed * Time.deltaTime);
        }

        characterController.Move (Velocity * Time.deltaTime);//characterControllerをVelocity * 時間の経過分動かす

		Velocity.y += Physics.gravity.y * Time.deltaTime;//Velocityのy軸をPhysics.gravity.y * 時間の経過分動かす
		if (characterController.isGrounded) {//もしcharacterControllerが地面に着いていたら
			if (Input.GetKey (KeyCode.Space)) {//もしSpaceキーがおされたら
				Velocity.y = JumpPower;//Velocity.yをJumpPowerにする
			}
		}
    }
}
入力し終わったらJumpPower、MoveSpeedに数値を入力してみましょう(お好みで調整してほしいですが、オススメは4、10です)
こちらのカメラの設定の仕方を参考にカメラも設定するといい感じです
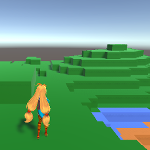
テストプレイをするとこんな感じです♪
WASDをおすと前後左右に移動して、スペースをおすとジャンプします
棒立ちなのはアニメーションをつけていないからですが、それは次回AnimatorControllerについて説明します
是非次の記事もご覧になってください
おまけ
他のパターンのキャラクターの移動
バイオハザード風(WSが前進後退、ADが向きの回転)
using System.Collections;
using System.Collections.Generic;
using UnityEngine;

public class Player : MonoBehaviour
{

    private CharacterController characterController;//CharacterControllerの機能を使うためにcharacterControllerという変数を作成
    private Vector3 Velocity;//CharacterControllerを動かすためのVector3型の変数を作成

    [SerializeField]
    private float JumpPower;
    [SerializeField]
    private float MoveSpeed;//移動スピードを入れるための変数

    // Use this for initialization
    void Start()
    {
        characterController = GetComponent<CharacterController>();//characterControllerにCharacterControllerを代入する
    }

    // Update is called once per frame
    void Update()
    {
        if (Input.GetKey(KeyCode.W))//Wキーがおされたら
        {
            characterController.Move (this.gameObject.transform.forward * MoveSpeed * Time.deltaTime);//前方にMoveSpeed * 時間経過分動かす
        }
        if (Input.GetKey(KeyCode.S))
        {
            characterController.Move (this.gameObject.transform.forward * -1 * MoveSpeed * Time.deltaTime);//後方にMoveSpeed * 時間経過分動かす
        }
        if (Input.GetKey(KeyCode.A))
        {
            transform.Rotate(new Vector3(0, -5, 0));//左回転する
        }
        if (Input.GetKey(KeyCode.D))
        {
            transform.Rotate(new Vector3(0, 5, 0));//右回転する
        }

       characterController.Move (Velocity * Time.deltaTime);

		Velocity.y += Physics.gravity.y * Time.deltaTime;
		if (characterController.isGrounded) {
			if (Input.GetKey (KeyCode.Space)) {
				Velocity.y = JumpPower;
			}
		}
    }
}
入力し終わったらJumpPower、MoveSpeedに数値を入力してみましょう(お好みで調整してほしいですが、オススメは4、10です)
また、カメラをプレイヤーにD&Dします
マインクラフト、フォートナイト風(マウスで方向転換、WASD移動)
using System.Collections;
using System.Collections.Generic;
using UnityEngine;

public class Player : MonoBehaviour
{
    private CharacterController characterController;
    private Vector3 Velocity;

    [SerializeField]
    private float JumpPower = 8;

    [SerializeField]
    private float MoveSpeed = 10;

    public float sensitivityX = 15f;//マウスの横の動きの強さ
    public float sensitivityY = 15f;//マウスの縦の動きの強さ

    public float minimumX = -360f;//横の回転の最低値
    public float maximumX = 360f;//横の回転の最大値

    public float minimumY = -60f;//縦の回転の最低値
    public float maximumY = 60f;//縦の回転の最大値

    float rotationX = 0f;
    float rotationY = 0f;

    public GameObject VerRot;//縦回転させるオブジェクト(カメラ)
    public GameObject HorRot;//横回転させるオブジェクト(プレイヤー)

    void Start()
    {
        characterController = GetComponent<CharacterController>();
    }

    void Update()
    {
        rotationX = transform.localEulerAngles.y + Input.GetAxis("Mouse X") * sensitivityX;//rotationXを現在のyの向きにXの移動量*sensitivityXの分だけ回転させる

        rotationY += Input.GetAxis("Mouse Y") * sensitivityY;//rotationYにYの移動量*sensitivityYの分だけ増やす
        rotationY = Mathf.Clamp(rotationY, minimumY, maximumY);//rotationYを-60〜60の値にする

        VerRot.transform.localEulerAngles = new Vector3(-rotationY, 0, 0);//オブジェクトの向きをnew Vector3(-rotationY, rotationX, 0)にする
        HorRot.transform.localEulerAngles = new Vector3(0, rotationX, 0);//オブジェクトの向きをnew Vector3(-rotationY, rotationX, 0)にする

        if (Input.GetKey(KeyCode.W))
        {
            characterController.Move(this.gameObject.transform.forward * MoveSpeed * Time.deltaTime);
        }

        if (Input.GetKey(KeyCode.S))
        {
            characterController.Move(this.gameObject.transform.forward * -1f * MoveSpeed * Time.deltaTime);
        }

        if (Input.GetKey(KeyCode.A))
        {
            characterController.Move(this.gameObject.transform.right * -1 * MoveSpeed * Time.deltaTime);
        }

        if (Input.GetKey(KeyCode.D))
        {
            characterController.Move(this.gameObject.transform.right * MoveSpeed * Time.deltaTime);
        }

        characterController.Move(Velocity * Time.deltaTime);

        Velocity.y += Physics.gravity.y * Time.deltaTime;
        if (characterController.isGrounded)
        {
            if (Input.GetKey(KeyCode.Space))
            {
                Velocity.y = JumpPower;
            }
        }
    }
}
入力し終わったらJumpPower、MoveSpeed、に数値を入力してみましょう(お好みで調整してほしいですが、オススメは4、10です)
カメラをプレイヤーにドラッグ&ドロップ、更にプレイヤーをスクリプトのところのHorRot、カメラをVarRotにD&Dします
因みにマウスの動く範囲や動かしやすさも調整可能です

コメント
コメント一覧 (1件)
[…] プレイヤーの移動(CharacterController) […]